
First Stamp Car onto copy paper then tape Parchment over top to keep from slipping. Trace design. You can use a White Pencil, a Scriber Tool (smallest ball tool) or as I used, a White Leaded Propelling Pencil.
Turn Parchment over (back) smooth over with a Tumble Dryer Sheet and using smallest Ball Tool emboss outline of Car


Turn Parchment over (Front). Smooth over with a Tumble Dryer Sheet then tape Parchment on Top of Oval Stencil. Place onto an Embossing Mat. Rest your hand on the edge of your Mat. Using Small Ball Tool Gently held in hand, go around the inside edge of Stencil. Do Not press hard. Gently one way and then come back the opposite way. Do a little at a time and TURN your work as you go. If you feel you have not kept the line even, it can be corrected by taking a slightly larger Ball Tool and going around the Oval again...this will also make it whiter. On this final line you can put a tiny bit of pressure (very lightly) to enhance the indentation of the Oval


Replace Trees with the Hills Groovi Plate and emboss the 5th line from the bottom. Then lightly emboss the 6th line.


Remove Parchment from Groovi Plate and transfer to The Bauble Border Plate.
Arrange the larger of the trees in the Bauble so that the line joins onto the curve of the 5th line that has already been embossed and the line of the small tree joins the 6th line, emboss both the trees. You can leave this as is or you can go back to the Groovi Hills Plate and join the line of the larger tree to the top of the hill. You can at this time go back over the lines of the hills with your smaller ball tool to make them whiter.


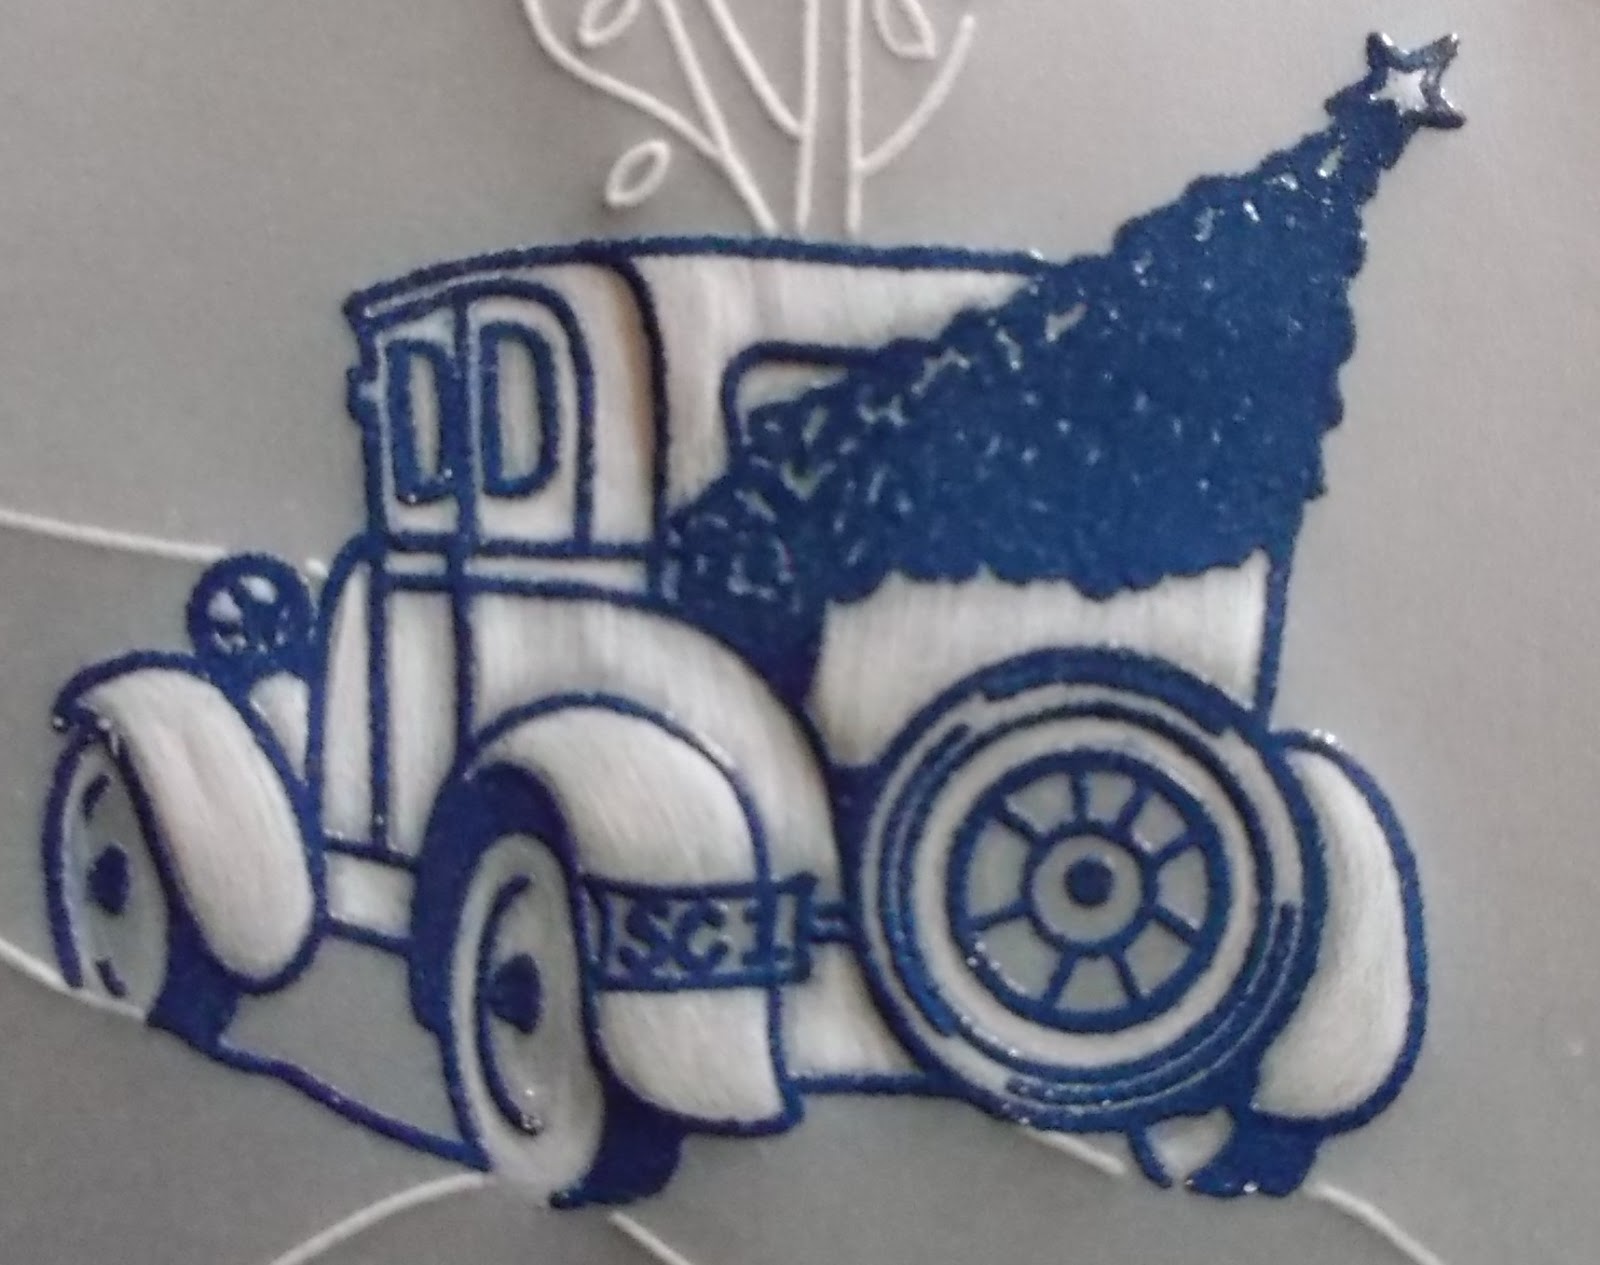
Transfer Parchment to Embossing Mat and working on the Back using Largest Ball Tool, Gently emboss the Trees. Begin with the small trees in the hills. Gently Flick back and forth, No Pressure. To get a deeper shade of white, progress down your Ball Tools till you are happy. Then go on to emboss the larger trees.

 As before, use Largest Ball Tool and progress down the sizes. For the Branches use Large Ball Tool, lightly emboss from the Tip of the Branch towards the join in the Trunk of the tree. Now again emboss from the Tip of the Branch downwards but this time do not come down as far as the join. Now use a smaller Ball Tool, emboss the Branches once more missing out the join.


 Only light shading is required for the Tree at the back of the car. I shaded this by taking a Large and then Medium Ball Tool and small flicks from the curves as in the pic on the left.
Add extra shading to the top of the Wheel Bumpers and the Curve of the roof. To do this place a Medium Ball Tool on the line at the top and Flick downwards, lifting Tool off at the end of each stroke.

For the Edging to this piece I used a double Line of Dots from the Border Groovie Plate to the size I wanted, then turned my parchment over and Pierced from the Front between the two lines using a two needle tool. I used Perga Glue to attach to Brown Backing Paper (hidden with a Flat Backed Pearl). Next came a layer of Pure White Backing Paper using double sided Tape. To the back of this I used a Double Sided Sticky Sheet (A6) to attach to the Brown Glitter Card (this helps it stick better) and finally on the back of that Double Sided Tape to attach to my Card Blank.
Using the Snowflake Groovi Plate I embossed, pierced then cut out two snowflakes. Attached them one on top of the other with Perga Glue and added a Flat Backed Pearl to the middle


As for the Sentiment, I embossed the letters from the Bunting Groovi Plate on the back of a bit of Parchment. Then from the Front I attached my parchment to a 2 x 4 Grid (this means It is suitable for a Two and a Four Needle Tool). I then very lightly pressed two rows of dots, framing the letters. I spaced the holes that I pierced two rows away from the small dots and pierced a rectangle. I removed the parchment from Grid, turned Parchment over and working on the Back I then did two rows of larger dots using the Dotted Line from the Border Groovi Plate.

Phew! All Done!!
Now for a little extra........
You can stamp the Car directly onto the Parchment if you are not comfortable with the tracing. To do this firstly Dust your Parchment with Talcum Powder. Ink up Stamp with Archival Brilliance Moonlight White Ink. Gently lower stamp into place....I find that the Clarity Stamp handles are the best for this....gently press on the Flat of the Stamp. Let the ink dry for a while before embossing.

You can also Heat Emboss on Parchment. It is best to use Detail Embossing Powder as the lines you get with ordinary embossing powder turn out to be quite thick and not as nice. Dust Parchment with Talcum Powder, Ink up Stamp with Versamark ink and very gently press onto Parchment. ( I ran out of white detail powder so I will show you a couple of samples of what it looks like with ordinary powder) You can then go on to emboss between the lines of the lineart.

You will note that there can be a slight warp to the parchment after heat embossing. The solution is to use a Double Sided Sticky Sheet on the back cut to fit the finished piece.
I hope you have enjoyed this step by step and that you have managed to survive to the end. I think you all deserve a nice cup of tea!
Happy Crafting!
Hugs
Emma xx


