Hi, today I will show you some results that can be achieved using Ink Dusters. I like to use them a lot. I find them easy to handle (and they make me feel as though I am painting). I first saw them being used on Create and Craft TV and then last year at the Christmas fair at the SSEC in Glasgow I saw them being demonstrated. I was quite impressed that they can be used on any medium, from copy paper to wood. Very impressed with the sample cards. The rule is to let the brush get comfortable in your hand (they are double ended) dab onto your ink (any kind can be used - bonus!) then dab a bit onto scrap paper before applying to your medium (card, paper etc.).
.JPG) |
| pic 1 |
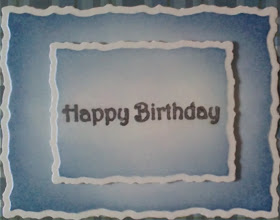
Apply ink lightly, re-apply to the depth of colour you want. You can use small or long strokes or even use in a circular motion. To give a darker look to a particular area pinch the bristles a bit (once you have inked +dabbed) then apply, or of course use a darker ink. When doing landscapes, tape your work to a piece of copy paper using low tack tape. Turn your work to portrait then start using your ink dusters to apply ink, it is easier to apply ink this way if you are using long strokes. Then if you want to apply the ink in a circular motion turn your work to landscape. (remember to turn your work not yourself when applying ink to corners or edges). In pic 1, I have cut out these shapes using spellbinders dies. I kept the dies on the card while going over them with the ink dusters. I used SUPER SMOOTH CARD.
.JPG) |
| pic2 |
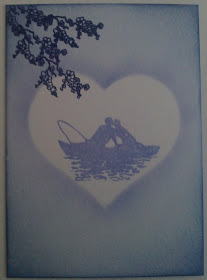
In pic 2, I stamped my images first then I covered the
kissing couple (from
Clarity Stamp) with a heart mask before shading with my ink duster. I shaded the corners first and then starting on the heart mask I came off it with my brush, turning my work while doing so.
I used an
ATC card and also mini Cherry Blossom from Clarity Stamp.
.JPG) |
pic3
|
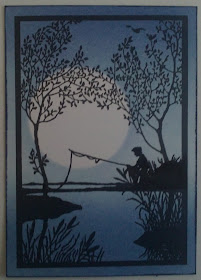
In pic 3, I stamped out my image,
Boy Fishing and
Small Landscape, put in a moon mask, then I shaded in the sky starting at the corners and working in. As you work in the ink gets lighter and this helps blend it all. I repeated the process for the foreground. I had used
THEUVA CARD for this project. You can see that I have taken the ink all the way to the edges and this has given it more definition.
.JPG)
|
| pic 4 |
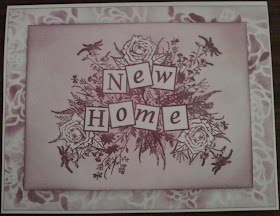
In pic 4, I have used the ink duster to shade the background using a Stencil that I had made and also to shade in the main image. The background is just plain old COPY PAPER
All the stamps used were Clarity Stamps.
You can also use over heat embossed images without causing any damage. And when you are finished you can leave the brushes to dry (the ink won't transfer) or you can give them a rinse out in water..
Now I must get on with my Christmas cards...getting behind a bit. Crafty hugs to all! x
.JPG)
.JPG)
.JPG)
.JPG)
No comments:
Post a Comment