Thank you to all who read my Blog and leave a comment. I really do appreciate every one of them and do my utmost to reply as soon as possible.
Crafty hugs to all!


Monday 23 May 2016

Groovi Scotland Workshop

Hi Folks!  Just a little update from me regarding the Groovi Parchment Workshops here in Scotland.

(Groovi is a Registered Trademark of Claritystamp Ltd)

The next workshop will be held on Saturday 11th June 2016, 10.30 - 3.30
Giffnock Scout Hall, Arthurlie Dr, Giffnock, G46 6UP


We will be using the above Groovi Plates on the day

combining traditional Parchment Techniques with the Claritystamp Groovi Parchment System

Workshop Cost: £20.00 with a £10.00 deposit required

To book a place on the workshop and for further details contact:
Emma Burns at: groovi.emburns1@gmail.com

Happy Crafting !!


Friday 20 May 2016

A little bit of Groovi for May

Hi Folks!  I hope you are all well and having fun wherever you are and whatever you are doing.  Me? I have had a good start to the month of May.  lots of Parching in my craft room, a surprise visit from my youngest daughter and her partner.  We also had a visit from our other daughter, so it was very lovely to have all my 3 children together.
Now I have to get myself organised for the next Groovi Workshops in Scotland and the next set of TV samples. But in the meantime I thought I would share some samples from the Groovi Show with the lovely talented Maria Simms from Claritystamp. You should check out her work!!!
Maria showcased two new designs of Groovi Plates to compliment the Geisha and Waterhouse Plates that were recently released.  These two new plates were designed by the lovely Tina Cox (isn't it fantastic news that she has joined Claritystamp).

So first up is a simple landscape featuring the new Bamboo and Butterflies Plate.
Also used were the Starter Kit, Double Line Border Plate, Nested Square Plate, Landscape Plate.
Just a quick piece embossed onto Pale Blue Parchment.
This card Features the New Fan Plate. I have added some detail from the Waterhouse Plate and kept it simple with some traditional whitework and Cutwork.
For the next card I used the new Clarity Light Panel with White Card over the Waterhouse Plate.  I embossed the Leaf pattern from the plate and then used Denim Adirondack Ink and a Clarity Stencil Brush to colour the card and Highlight the Leaf Pattern. I stamped With Love from the Happy Words Set.  On Blue Parchment I embossed the smaller part of the fan design in individual pieces, pierced and cut around before arranging them on a corner of the card.  I added some tiny flat backed pearls to the center of the detailing on the fan.
 For this piece I used Pale Green Parchment and embossed the lineart from one of the Wren Plates.
I coloured the bird using Polychromos Pencils and the Leaf Pattern with a Promarker
I then added some detailing to the border using the Square Grid
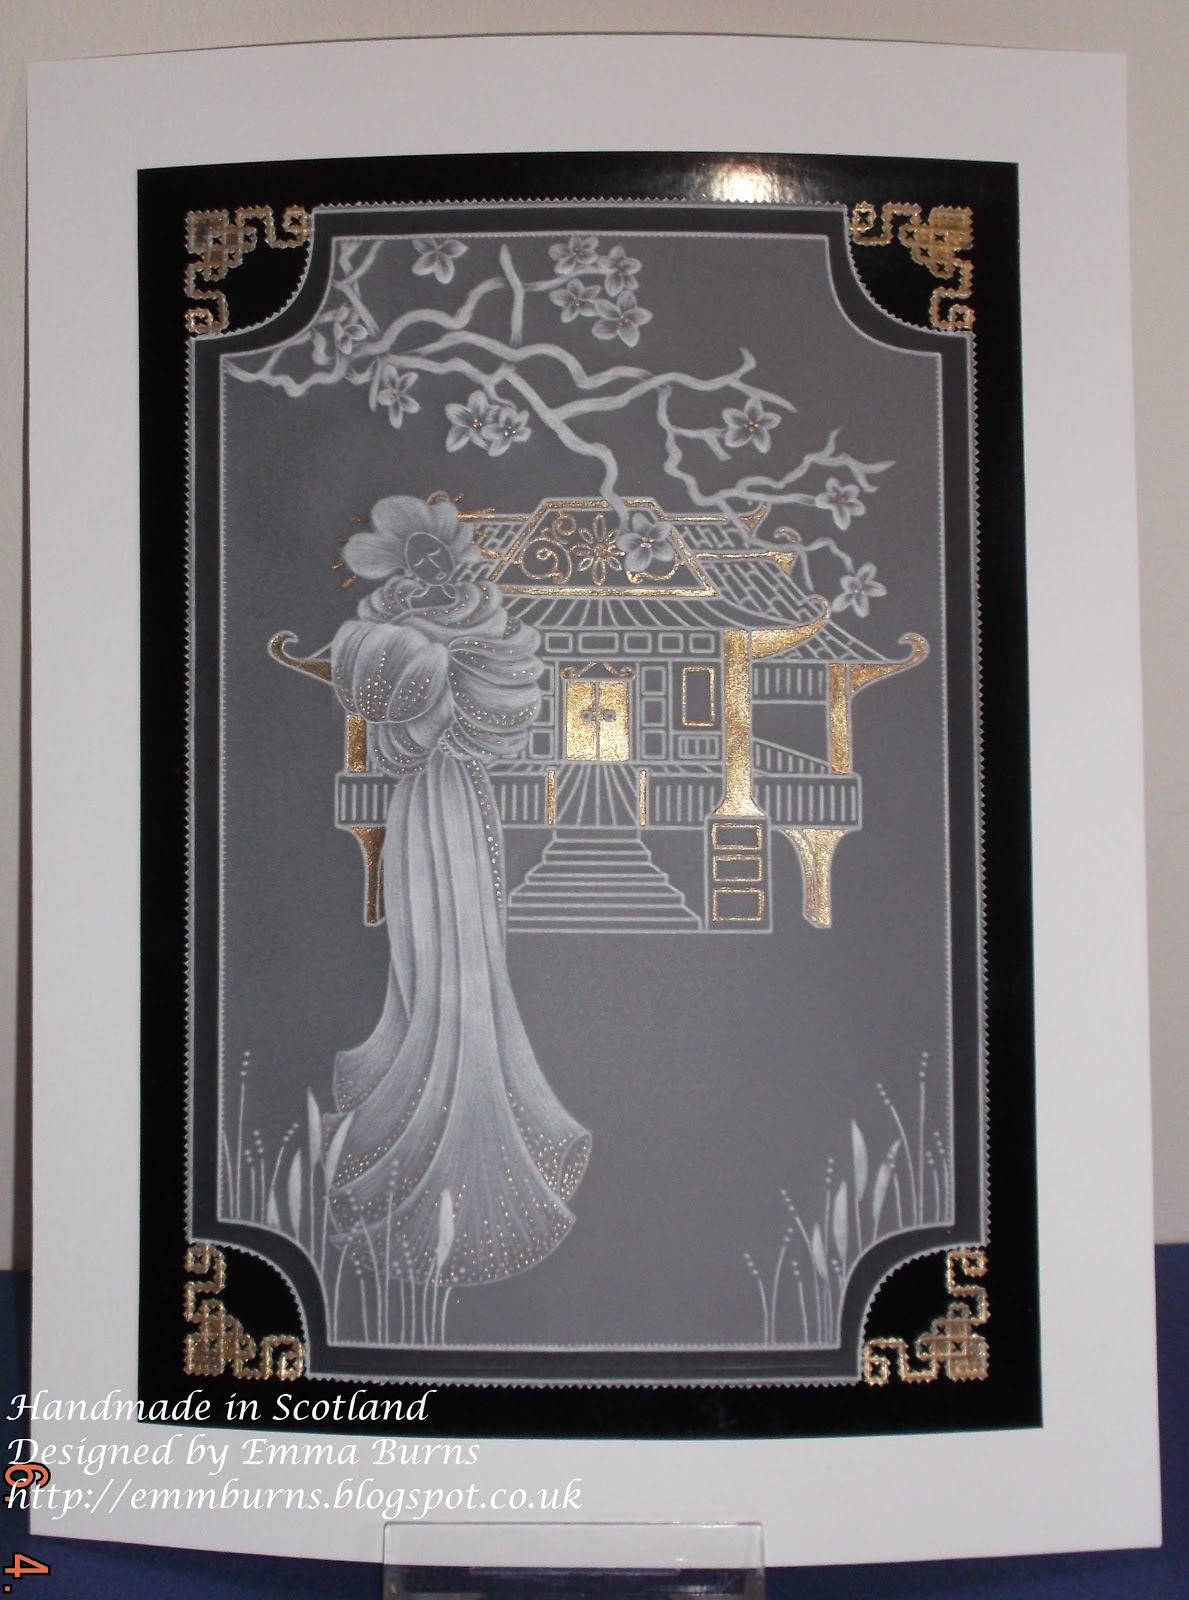
Also shown on the show was the lovely Geisha Plate.  This piece is simple Gold on White, using Tinta Gold Ink on the Waterhouse, Flowers, Dots on the Dress and on the Corner Design.  The frame is made up of the Ornate Box Framer Plate, a corner design from the Geisha Plate and Double Line Border Plate.  A black Promarker was used along the edge to hide the double sided tape.
This last card is another simple piece using another Wren Plate, Nested Circles and Baby Nested Circles, Nested Squares, Straight Grid and Diagonal Grid.
All Groovi Products can be found following the Orange Groovi link at the top right of this blog!

So that's my offering for the moment.  There is a lot more to come!
There is also lots more goodies to come from Claritystamp 
(they are working their little socks off back at Clarity Towers)
So keep an eye out for news updates....Barbara Gray has a treat in store for all you lovely crafters.

Now I really must get on with organising myself and my Groovi Parchment Workshops, Design Samples.....lots to do.....days disappearing..... or is it just me getting old......don't answer that!!!

Hugs to you all 
Happy Crafting

Emma xx

p.s.   If anyone is interested in joining in with a Groovi Parchment Workshop held in Scotland, then please contact me at:  groovi.emburns1@gmail.com  and I will get back to you with more details. xx

Sunday 1 May 2016

Claritystamp Challenge 39

Hi Folks! Ready for another challenge from Claritystamp?  
Yes it's the 1st May and the new theme is ANYTHING GOES
(as long as it's Clarity)

This Design is made up of three stages to get the finished piece.

The first stage was made using the Groovi Parchment Starter Kit and Square Nested Plate to make my rectangular Frame. Once I had made the frame I then added the butterflies.  Now the larger butterflies are my design but I took the shape for the smaller ones from a combination of the Butterfly Groovi Plate and Clarity Butterfly Stamp.  I used the No.1 ball tool very lightly to emboss from the plates to give me a very fine line and as I added the whitework to them I adjusted them slightly. ( I stamped various butterflies onto copy paper and picked out the bits I wanted to use by tracing over the designs with my scriber VERY gently. I then added white dots around all the butterflies using one of the first Border plates using the 'in-line' technique.

I added the background using the Sprig Groovi Plate....this is one of my favourite plates, I use it quite a lot....did you know that the design tessellates? A Fabulous Groovi Plate.  I used a combination of Promarkers and Polychromos Pencils for colouring.  


I pierced on the line around the butterflies using a two needle tool. I also played around with the grids to pierce a few designs on a couple of butterflies.  the piercing on the largest is done freehand.  You can see from the picture how I have used the Grid Plate to add the dots to the butterfly and then colouring in from the back. 
I pierced around the Frame and cut away the excess parchment to give a picot edge.  I then cut around all the butterfly wings so that they can be raised.
Stage two shows how I made a hinge with tape onto another piece of parchment so I could match the Frame size and get the Sprig Design in the exact same position for the backing piece as it is on the Front piece.  I coloured the frame with  Promarkers.  I love the way I can get seamless shading with promarkers, especially on larger areas.  No lines or blotches and they work great in combination with Blendable pencils.

Third stage was to cut a piece of Grey board to mount the design onto.  I used a mount board cutter for this (thank you again Carrie for my Present.....see, I do use it!)  I applied Mod Podge to the Grey Board and then covered the front with 12 x 12 Burgundy card.  I trimmed the corners, folded the excess over the back and once again applied Mod Podge to keep the card in place.  I then cut another Piece of Burgundy card to fit the back which again was coated in Mod Podge.
Despite how tidy and prepared I was, I managed to get a sticky bit of Mod Podge on the front so this meant that I would have to disguise it.  Solution...give the whole thing a further coat of Mod Podge.  It gives a great sheen to the piece...it was looking a bit flat before.

Once it was all dry I attached the framed sprig piece to the centre using Large Double Sided Red Tape.

Now to attach the Front piece of the design I simply used my Pergamano Glue behind the bodies of all the butterflies and using a cocktail stick I applied glue to the inner part of the frame, laid the top piece directly over the piece already mounted.  I then laid several layers of copy paper over the top and used my hand to apply pressure.   I left it for an hour (I know Perga Glue dries quick but I wasn't tempting fate) before going back to then begin lifting the wings up.

See how the sprig design matches
and the reason for the dots around the butterflies......
I made a card similar to this years ago and the cut edge wasn't very neat (not the picot)
so this time I decided to add the dots knowing they would give a better finish to the edges.

So this is my design sample for the challenge, I do hope you like it..
I also hope that you will enter the Challenge
First Prize is a £50 gift voucher for Claritystamp Ltd
(not to be sneezed at!!)
The winner is chosen at random
The top 5 favourites are chosen by the Design Team.

So go on, give it a go.  It's a great chance to showcase your work!!
You never know where it will lead!!!

To see all the Design Team Samples click on the following link....I am sure you will be delighted.
http://claritystampchallenge.blogspot.co.uk/

And remember there is also the fabulous Calendar Challenge from Barbara Gray too.

Happy Crafting
And Good luck

Emma xx