Click on Photographs to enlarge
 Tip 1) When cutting out a delicate Parchment piece start with the smallest area that is pierced working from the center outwards. Before working on the outer edge.
Tip 3) To make Clear Shrink Plastic look FROSTED you just have to hold your heat gun on it a bit longer once you have got it down to the final size it will shrink to. Little bubbles will appear, just move your heat gun slowly to make the bubbles more uniform. Leave to cool.
Tip 4) No matter how good you think your stencil tape is, always remember to DE-TACK it or you will end up with the result opposite on your artwork....I have tried various tapes and have had to DE-TACK them all after making this mistake. You can DE-TACK by running your hands along the tape to pick up the oils from your skin, or very gently rub a tumble dryer sheet over your card. You can also put the tape onto a piece of clothing a few times before putting onto your card.
Tip 5) Anyone using a Brayer to colour your background or when stamping an image over the edge of your picture, will at some point come across the problem of the ink getting on to the stencil tape and having to either wait for this to dry or very carefully wiping the excess away. Quick solution that works....Just put more tape over the first layer and then you are assured that there will be no more unwanted ink transferred onto your picture. And because it is not directly going on to your card but over the first layer you can get away with really cheap masking tape for this bit.
Tip 6) Have you had problems with card creasing when putting it through a die cutter? Ruins the effect of what you were trying to achieve. Want a quick and easy solution?
Easy peasy!
Take an embossing tool (the larger the better) and with a small gentle circular motion you can smooth the creases back out.
Don't press too hard or you can flatten out the design too much.
 |
| image one |
 |
| image two |
Tip 7) Storage for Dies...I use A5 Black Pockets for storing my dies. They are usually used for Post Card Collections but I found them to be really useful. They come in packets of 10 sheets and they have 4 clear plastic pockets to each sheet. I cut a magnetic sheet to fit each pocket (or die if they are small...waste not) mount my die and then I put the black sheets into an A5 binder. This easily stores on a bookshelf. If your dies do not fit the pockets you can still use an A5 polypocket to fit into the binder.
I also use the black pockets for my mini embossing folders and A5 polypockets for my larger embossing folders and keep them all together in a binder. (extra tip) Take an impression on cheap paper and put it in the pocket alongside the die or embossing folder...quick reference to what it is and where you had it and also if you are like me and lend to friends then you know what you have out on loan.
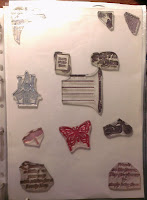
Tip 8) Stamp Storage...When I get a new stamp I always take a record of it before storing it away. I take a piece of copy paper (A4 for my Clarity Stamp Collection as I do have a lot of them and the sets have a lot in them and A5 for my other clear stamps or cling stamps). I stamp up the images in black ink (just cheap run of the mill ink) put this into a polypocket, put my stamps onto acetate and put this in the pocket which I put into the appropriate binders. This helps for easy reference and for making sure I don't loose any stamps from any sets. I also have an A4 folder which just contains images of all my wooden, magnetic and foam stamps - I keep these stamps in plastic drawers.
Tip 9) Do you have a problem with fluff or stray hair getting into your stamps?
Well no matter how carefully I store or clean my stamps I have to admit that the dust fairy does pop in now and then....so annoying especially if you have taken great care with creating a lovely image only to notice that you have managed to ink a stray hair.
Easy and quick solution! Take a piece of ordinary masking tape, place over your stamp and press lightly...you can use your nails to push the tape over the edges of the stamp. Remove the tape. If it is a large stamp then you can still use the same bit tape to go over the rest of it.


No comments:
Post a Comment